Showing posts with label Widgets. Show all posts

Tuesday, April 27, 2010

Design a Widget for Your Blog

22 comments
Design a Widget for Your Blog.Widgets are helpful tools that allow readers of your blog to access other Web sites lead them to anything you find useful or interesting


Step 1:Use HTML or JavaScript to design a widget. To create a widget you will need to use a complicated block of code that usually results in an animated image or other graphic. There are programs available to assist in designing widgets, but the process is usually difficult for inexperienced users.

Step 2:Host the newly designed widget on your Web site or server and connect it to the Blogger.com Web site. You must include the URL 'http://www.blogger.com/add-widget' as the form action to have Blogger.com handle your widget.

Step 3:Include the widget ID and type in the code, as these are required elements. The 'locked,' 'title' and 'page type' attributes are all optional in your widget
code.

Add the Widget to Your Blog

Step 1:Click on the 'Submit' button or 'Add to Blogger' button that is attached to the customized widget. Users will then be taken automatically to a Blogger.com form.

Step 2:Log in to Blogger.com and select one of your blogs. You will also see the title of the widget and have an opportunity to edit the content and template for the page element.

Step 3:Click on 'Add Widget' to add the code to your blog and see the widget in action.

Tuesday, March 30, 2010

Yahoo Smileys Emotions Hack in Comment Section

50 comments

This post is not unique but my friend asked me that how add yahoo smileys emotions in blogger comment now I post this hacks from help of anshuldudeja.com and I also this hack in my blog enjoy this yahoo smileys emotions hack.

Step 1 : Login your Blogger Account

Step 2 : Go to Layout


Step 3 : Open Edit HTML and Check on Expand Widgets Templates


Step 4 : Now Find below Code


<p class='comment-footer'>
<b:if cond='data:post.embedCommentForm'>
<b:include data='post' name='comment-form'/>
<b:else/>
<b:if cond='data:post.allowComments'>
<h3><a expr:href='data:post.addCommentUrl'
expr:onclick='data:post.addCommentOnclick'>
<data:postCommentMsg/></a></h3>
</b:if>
</b:if>
</p>
</b:if>


Step 5 :Replace the above codes with below one


<p class='comment-footer'>
<b:if cond='data:post.embedCommentForm'>
<div style='-moz-background-clip: -moz-initial; -moz-background-origin: -moz-initial; -moz-background-inline-policy: -moz-initial; width: 369; text-align: left; border: 1px solid #cccccc; padding: 5px; background: #eeeddf; height:86'>
<b>
<img border='0' height='18' src='http://us.i1.yimg.com/us.yimg.com/i/mesg/emoticons7/21.gif' width='18'/> :))
<img border='0' height='18' src='http://us.i1.yimg.com/us.yimg.com/i/mesg/emoticons7/71.gif' width='18'/> ;))
<img border='0' height='18' src='http://us.i1.yimg.com/us.yimg.com/i/mesg/emoticons7/5.gif' width='18'/> ;;)
<img border='0' height='18' src='http://us.i1.yimg.com/us.yimg.com/i/mesg/emoticons7/4.gif' width='18'/> :D
<img border='0' height='18' src='http://us.i1.yimg.com/us.yimg.com/i/mesg/emoticons7/3.gif' width='18'/> ;)
<img border='0' height='18' src='http://us.i1.yimg.com/us.yimg.com/i/mesg/emoticons7/10.gif' width='18'/> :p
<img border='0' height='18' src='http://us.i1.yimg.com/us.yimg.com/i/mesg/emoticons7/20.gif' width='22'/> :((
<img border='0' height='18' src='http://us.i1.yimg.com/us.yimg.com/i/mesg/emoticons7/1.gif' width='18'/> :)
<img border='0' height='18' src='http://us.i1.yimg.com/us.yimg.com/i/mesg/emoticons7/2.gif' width='18'/> :(
<img border='0' height='18' src='http://us.i1.yimg.com/us.yimg.com/i/mesg/emoticons7/8.gif' width='18'/> :X
<img border='0' height='18' src='http://us.i1.yimg.com/us.yimg.com/i/mesg/emoticons7/12.gif' width='18'/> =((
<img border='0' height='18' src='http://us.i1.yimg.com/us.yimg.com/i/mesg/emoticons7/13.gif' width='18'/> :-o
<img border='0' height='18' src='http://us.i1.yimg.com/us.yimg.com/i/mesg/emoticons7/7.gif' width='20'/> :-/
<img border='0' height='18' src='http://us.i1.yimg.com/us.yimg.com/i/mesg/emoticons7/11.gif' width='18'/> :-*
<img border='0' height='18' src='http://us.i1.yimg.com/us.yimg.com/i/mesg/emoticons7/22.gif' width='18'/> :|
<img border='0' height='18' src='http://us.i1.yimg.com/us.yimg.com/i/mesg/emoticons7/35.gif' width='24'/> 8-}
<img border='0' height='18' src='http://us.i1.yimg.com/us.yimg.com/i/mesg/emoticons7/100.gif' width='31'/> :)]
<img border='0' height='18' src='http://us.i1.yimg.com/us.yimg.com/i/mesg/emoticons7/102.gif' width='44'/> ~x(
<img border='0' height='18' src='http://us.i1.yimg.com/us.yimg.com/i/mesg/emoticons7/104.gif' width='30'/> :-t
<img border='0' height='18' src='http://us.i1.yimg.com/us.yimg.com/i/mesg/emoticons7/66.gif' width='18'/> b-(
<img border='0' height='18' src='http://us.i1.yimg.com/us.yimg.com/i/mesg/emoticons7/62.gif' width='18'/> :-L
<img border='0' height='18' src='http://us.i1.yimg.com/us.yimg.com/i/mesg/emoticons7/14.gif' width='34'/> x(
<img border='0' height='18' src='http://us.i1.yimg.com/us.yimg.com/i/mesg/emoticons7/24.gif' width='30'/> =))
</b>
</div>
<b:include data='post' name='comment-form'/>
<b:else/>
<b:if cond='data:post.allowComments'>
<a expr:href='data:post.addCommentUrl' expr:onclick='data:post.addCommentOnclick'><data:postCommentMsg/></a>
</b:if>
</b:if>
</p>
</b:if>


Step 6 : Now find the </body> tag and paste the following script just before it.

<script src='http://bandofgirls.googlepages.com/smiley.js' type='text/javascript'/><noscript><a href="http://anshuldudeja.blogspot.com" target="_blank">Blogger Widgets</a></noscript>

Monday, February 15, 2010

How to add Animated Sexy Social Bookmarks Blogger?

4 comments

Here a widget that is Sexy Social Bookmarks in animated action and almost include good social network site added.Social bookmarking is a method for Internet users to share, organize, search, and manage bookmarks of web resources. Unlike file sharing, the resources themselves aren't shared, merely bookmarks that reference them.
Social networking is very useful tools to get huge traffic.
Start to add this follow steps


Step 1: Login to Blogspot.com

Step 2: Click on Layout

Step 3: Then click Edit HTML


Step 4: Download Full Template


Step 5: Mark on Expand Widget Templates


Step 6: Find the code like this : </head>

Step 7:. Copy below code and paste it before </head>


<script src='http://code.jquery.com/jquery-latest.js' type='text/javascript'/>
<script type='text/javascript'>
jQuery(document).ready(function() {
// xhtml 1.0 strict way of using target _blank
jQuery('.sexy-bookmarks a.external').attr("target", "_blank");
// this block sets the auto vertical expand when there are more than
// one row of bookmarks.
var sexyBaseHeight=jQuery('.sexy-bookmarks').height();
var sexyFullHeight=jQuery('.sexy-bookmarks ul.socials').height();
if (sexyFullHeight>sexyBaseHeight) {
jQuery('.sexy-bookmarks-expand').hover(
function() {
jQuery(this).animate({
height: sexyFullHeight+'px'
}, {duration: 400, queue: false});
},
function() {
jQuery(this).animate({
height: sexyBaseHeight+'px'
}, {duration: 400, queue: false});
}
);
}
// autocentering
if (jQuery('.sexy-bookmarks-center')) {
var sexyFullWidth=jQuery('.sexy-bookmarks').width();
var sexyBookmarkWidth=jQuery('.sexy-bookmarks:first ul.socials li').width();
var sexyBookmarkCount=jQuery('.sexy-bookmarks:first ul.socials li').length;
var numPerRow=Math.floor(sexyFullWidth/sexyBookmarkWidth);
var sexyRowWidth=Math.min(numPerRow, sexyBookmarkCount)*sexyBookmarkWidth;
var sexyLeftMargin=(sexyFullWidth-sexyRowWidth)/2;
jQuery('.sexy-bookmarks-center').css('margin-left', sexyLeftMargin+'px');
}
});
</script>

<style type="text/css">
div.sexy-bookmarks{margin:20px 0 0 0; border: 0;outline: none;clear:both !important}
div.sexy-bookmarks-expand{height:29px; overflow:hidden}
.sexy-bookmarks-bg-sexy, .sexy-bookmarks-bg-love{background-image:url('http://img31.imageshack.us/img31/176/sexytrans.png') !important; background-repeat:no-repeat}
div.sexy-bookmarks-bg-love{padding:26px 0 0 10px; background-position:left -1148px !important}
div.sexy-bookmarks ul.socials{width:100% !important; margin:0 !important; padding:0 !important; float:left}
div.sexy-bookmarks ul.socials li{display:inline !important; float:left !important; list-style-type:none !important; margin:0 !important; height:29px !important; width:60px !important; cursor:pointer !important; padding:0 !important}
div.sexy-bookmarks ul.socials li:before, div.sexy-bookmarks ul.socials li:after, div.sexy-bookmarks ul.socials li a:before, div.sexy-bookmarks ul.socials li a:after{content:none !important}
div.sexy-bookmarks ul.socials a{display:block !important; width:60px !important; height:29px !important; text-indent:-9999px !important; background-color:transparent !important}
div.sexy-bookmarks ul.socials a:hover{background-color:transparent !important}
.sexy-digg, .sexy-digg:hover, .sexy-reddit, .sexy-reddit:hover, .sexy-stumbleupon, .sexy-stumbleupon:hover, .sexy-delicious, .sexy-delicious:hover, .sexy-yahoobuzz, .sexy-yahoobuzz:hover, .sexy-blinklist, .sexy-blinklist:hover, .sexy-technorati, .sexy-technorati:hover, .sexy-facebook, .sexy-facebook:hover, .sexy-twitter, .sexy-twitter:hover, .sexy-myspace, .sexy-myspace:hover, .sexy-mixx, .sexy-mixx:hover, .sexy-scriptstyle, .sexy-scriptstyle:hover, .sexy-designfloat, .sexy-designfloat:hover, .sexy-comfeed, .sexy-comfeed:hover, .sexy-newsvine, .sexy-newsvine:hover, .sexy-linkedin, .sexy-linkedin:hover, .sexy-google, .sexy-google:hover, .sexy-friendfeed, .sexy-friendfeed:hover{background:url('http://img717.imageshack.us/img717/3006/sexyspritenew.png') no-repeat !important;border: 0;outline: none;}
.sexy-digg{background-position:-980px bottom !important}
.sexy-digg:hover{background-position:-980px top !important}
.sexy-reddit{background-position:-700px bottom !important}
.sexy-reddit:hover{background-position:-700px top !important}
.sexy-stumbleupon{background-position:-630px bottom !important}
.sexy-stumbleupon:hover{background-position:-630px top !important}
.sexy-delicious{background-position:-1190px bottom !important}
.sexy-delicious:hover{background-position:-1190px top !important}
.sexy-yahoobuzz{background-position:-1120px bottom !important}
.sexy-yahoobuzz:hover{background-position:-1120px top !important}
.sexy-blinklist{background-position:-1260px bottom !important}
.sexy-blinklist:hover{background-position:-1260px top !important}
.sexy-technorati{background-position:-560px bottom !important}
.sexy-technorati:hover{background-position:-560px top !important}
.sexy-myspace{background-position:-770px bottom !important}
.sexy-myspace:hover{background-position:-770px top !important}
.sexy-twitter{background-position:-490px bottom !important}
.sexy-twitter:hover{background-position:-490px top !important}
.sexy-facebook{background-position:-1330px bottom !important}
.sexy-facebook:hover{background-position:-1330px top !important}
.sexy-mixx{background-position:-840px bottom !important}
.sexy-mixx:hover{background-position:-840px top !important}
.sexy-scriptstyle{background-position:-280px bottom !important}
.sexy-scriptstyle:hover{background-position:-280px top !important}
.sexy-designfloat{background-position:-1050px bottom !important}
.sexy-designfloat:hover{background-position:-1050px top !important}
.sexy-newsvine{background-position:left bottom !important}
.sexy-newsvine:hover{background-position:left top !important}
.sexy-google{background-position:-210px bottom !important}
.sexy-google:hover{background-position:-210px top !important}
.sexy-comfeed{background-position:-420px bottom !important}
.sexy-comfeed:hover{background-position:-420px top !important}
.sexy-linkedin{background-position:-70px bottom !important}
.sexy-linkedin:hover{background-position:-70px top !important}
.sexy-friendfeed{background-position:-1750px bottom !important}
.sexy-friendfeed:hover{background-position:-1750px top !important}
.sexy-link{ margin-left:25px; float:left}
.sexy-link A{padding:10px 0; width:470px; text-align:right; border:0; outline:none}</style>


Step 8 : Find <data:post.body/> and replace with below code


<div class='sexy-bookmarks sexy-bookmarks-expand sexy-bookmarks-bg-love' style='margin:20px 0 0 0 !important; padding:25px 0 0 10px !important; height:29px;/*the height of the icons (29px)*/ display:block !important; clear:both !important;'>
<ul class='socials'>
<li class='sexy-delicious'><a class='external' expr:href='&quot;http://del.icio.us/post?url=&quot;+ data:post.url + &quot;&amp;title=&quot; + data:post.title' rel='nofollow' title='Share this on del.icio.us'>Share this on del.icio.us</a></li>
<li class='sexy-digg'><a class='external' expr:href='&quot;http://digg.com/submit?phase=2&amp;url=&quot;+ data:post.url + &quot;&amp;title=&quot; + data:post.title' rel='nofollow' title='Digg this!'>Digg this!</a></li>
<li class='sexy-stumbleupon'><a class='external' expr:href='&quot;http://www.stumbleupon.com/submit?url=&quot;+ data:post.url + &quot;&amp;title=&quot; + data:post.title' rel='nofollow' title='Stumble upon something good? Share it on StumbleUpon'>Stumble upon something good? Share it on StumbleUpon</a></li>
<li class='sexy-reddit'><a class='external' expr:href='&quot;http://reddit.com/submit?url=&quot;+ data:post.url + &quot;&amp;title=&quot; + data:post.title' rel='nofollow' title='Share this on Reddit'>Share this on Reddit</a></li>
<li class='sexy-google'><a class='external' expr:href='&quot;http://www.google.com/bookmarks/mark?op=add&amp;bkmk=&quot;+ data:post.url + &quot;&amp;title=&quot; + data:post.title' rel='nofollow' title='Add this to Google Bookmarks'>Add this to Google Bookmarks</a></li>
<li class='sexy-twitter'><a class='external' expr:href='&quot;http://twitter.com/home?status=Reading: &quot; + data:blog.title + &quot; - &quot; + data:post.url + &quot; (@NAME)&quot;' rel='nofollow' title='Tweet This!'>Tweet This!</a></li>
<li class='sexy-facebook'><a class='external' expr:href='&quot;http://www.facebook.com/share.php?u=&quot;+ data:post.url + &quot;&amp;title=&quot; + data:post.title' rel='nofollow' title='Share this on Facebook'>Share this on Facebook</a></li>
<li class='sexy-mixx'><a class='external' expr:href='&quot;http://www.mixx.com/submit?page_url=&quot; + data:post.url' rel='nofollow' title='Share this on Mixx'>Share this on Mixx</a></li>
<li class='sexy-comfeed'><a class='external' expr:href='data:blog.homepageUrl + &quot;feeds/posts/default&quot;' rel='nofollow' title='Subscribe'>Subscribe</a></li>
<li class='sexy-yahoobuzz'><a class='external' expr:href='&quot;http://buzz.yahoo.com/submit/?submitUrl=&quot; + data:post.url' rel='nofollow' title='Buzz up!'>Buzz up!</a></li>
<li class='sexy-linkedin'><a class='external' expr:href='&quot;http://www.linkedin.com/shareArticle?mini=true&amp;url=&quot;+ data:post.url + &quot;&amp;title=&quot; + data:post.title' rel='nofollow' title='Share this on Linkedin'>Share this on Linkedin</a></li>
<li class='sexy-designfloat'><a class='external' expr:href='&quot;http://www.designfloat.com/submit.php?url=&quot;+ data:post.url + &quot;&amp;title=&quot; + data:post.title' rel='nofollow' title='Submit this to DesignFloat'>Submit this to DesignFloat</a></li>
<li class='sexy-technorati'><a class='external' expr:href='&quot;http://technorati.com/faves?add=&quot;+ data:post.url + &quot;&amp;title=&quot; + data:post.title' rel='nofollow' title='Share this on Technorati'>Share this on Technorati</a></li>
<li class='sexy-scriptstyle'><a class='external' expr:href='&quot;http://scriptandstyle.com/submit?url=&quot;+ data:post.url + &quot;&amp;title=&quot; + data:post.title' rel='nofollow' title='Submit this to Script &amp; Style'>Submit this to Script &amp; Style</a></li>
<li class='sexy-myspace'><a class='external' expr:href='&quot;http://www.myspace.com/Modules/PostTo/Pages/?u=http&quot;+ data:post.url + &quot;&amp;title=&quot; + data:post.title' rel='nofollow' title='Post this to MySpace'>Post this to MySpace</a></li>
<li class='sexy-blinklist'><a class='external' expr:href='&quot;http://www.blinklist.com/index.php?Action=Blink/addblink.php&amp;Url=&quot;+ data:post.url + &quot;&amp;title=&quot; + data:post.title' rel='nofollow' title='Share this on Blinklist'>Share this on Blinklist</a></li>
<li class='sexy-friendfeed'><a class='external' expr:href='&quot;http://friendfeed.com/?url=&quot; + data:post.url + &quot;&amp;title=&quot; + data:post.title' rel='nofollow' title='Share this on FriendFeed'>Share this on FriendFeed</a></li>
<li class='sexy-newsvine'><a class='external' expr:href='&quot;http://www.newsvine.com/_tools/seed&amp;save?u=&quot;+ data:post.url + &quot;&amp;title=&quot; + data:post.title' rel='nofollow' title='Seed this on Newsvine'>Seed this on Newsvine</a></li>
</ul>
<div style='clear:both;'/>
</div>
<div class='sexy-link'> Widget by <a href='http://www.latestbloggertricks.com/' title='Latest and new blogger tricks,tips and hacks'>Latest Blogger Tricks </a>|<a href='http://www.tutzone.org/' '> TutZone</a></div>


Step 9 : Now Save your Template and Done

Saturday, February 13, 2010

How to add Popular Post Widget for Blogger/Blogspot?

14 comments
Popular Post Widget for Blogger is a good Bloggers widgets that show your blog popular post on sidebar and its show your visitor that whats posts are good and whats is liking your visitor so try this widget and you enjoy.

Step 1 : Log in Blogger Account

Step 2 : Go to Layouts


Step 3 : Now in "Add page Element" Click on "Add a Gadget"


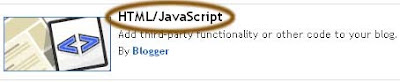
Step 4 : Click on "HTML/JavaScript" and Add the below code there and Save


<script type="text/javascript">
function pipeCallback(obj) {
document.write('<ul style="text-transform: capitalize;">');
var i;
for (i = 0; i < obj.count ; i++)
{
var href = "'" + obj.value.items[i].link + "'";
var item = "<li>" + "<a href=" + href + ">" + obj.value.items[i].title + "</a> </li>";
document.write(item);
}
document.write('</ul>');
}
</script>
<script src="http://pipes.yahoo.com/pipes/pipe.run?_render=json&_callback=pipeCallback&_id=28a6afad7c6ba1288c1b738277e42385&url=http%3A%2F%2Fwww.latestbloggertricks.com&num=10" type="text/javascript"></script>


Note: Please replace this link www.latestbloggertricks.com whith your blog link.
Your Url/Domain Without http://
Example: YourBlogAdderss.blogspot.com or www.YourUrl.com

Tuesday, February 9, 2010

Easy Navigate by Using Wibiya Toolbar For Blogger/Wordpress

1 comments
Wibiya Toolbar is Footer toolbar for blogspot/wordpress or any website can boost make easy navigation and easy to use for your readers. you can show this toolbar live in this blog at bottom.Below here is a step by step tutorial on how you can add wibiya toolbar javascript in you blogger blogs.

Step 1. To add this toolbar, you should be invited or directly go to Wibiya Website and request for invitation.

Step 2. After sending your request, wait for 24 hours or even longer. They will send a notification to the email your provided to them, it has a link and a beta code.

Step 3. After clicking the link you can register with wibiya and configure (Generate) your toolbar.

Step 4. Select the color of your toolbar. And continue to click "Next".

Step 5. Select the Widgets and application you wish to show in toolbar and Done. Now you will have a Javascript code which you need to put in your Blogger Template. (For Wordpress users this can be done directly from your dashboard or putting code in footer.php file)

Step 6. Login to Your Blogger Account

Step 7. On Your Dashboard, Click on Layout


Step 8. Now Click on Edit HTML


Step 9. Just before the </body> code. Paste JavaScript code.


Step 10. Now your Work Done

Monday, February 8, 2010

Increase Rank in Entrecard by Using Top Entrecard Droppers Widgets

3 comments
What is Entrecard?

It's a free blogging network that helps you build traffic, get more readers, and network with other bloggers. You put a 125×125 widget on your blog and you can earn “EC credits” when members visit your blog. You can use the “credits” to purchase advertising on other blogs in our network.
If you're a EntreCard member and you rewards your top droppers, your blog or website URL should be in this directory. It is a Wall of Fame for the rewarders and also to encourage other EntreCard members to drop by to your blog. That will improve traffic to your blog while the top dropper get a free backlink reward from you.

Step 1. Log-in to your EntreCard dashboard

Step 2. Click on “More Stats” link, you will be taken to a page contains lots of useful information such as number of cards that were dropped on your blog each day, number of clicks through to your site from Entrecard, number of cards that you dropped on other peoples sites, … Scroll down a bit to the middle of page then you will see aRSS feed for “Top Card Droppers”, right click on it and choose option “Copy Link Location” to copy the link to clipboard.


Step 3. Login to your Blogger account.

Step 4. Click on the “Layout” link

Step 5. Make sure you are in tab “Page Elements”


Step 6. Choose a place where you want to put your widgets on, then click “Add a Gadget”. When a pop-up window is opened, choose a Feed gadget (its location is in the middle of the pop-up window)


Step 7. Press Ctrl+V to paste the link you put to clipboard at Step #2


Step 8. Change title, options if you want


Step 9. Click Save and DONE

Tuesday, February 2, 2010

Add Recent Comments in Your Blogger from RSS Feed

4 comments
If your want to show your recent comments then you try this easy trick
Step 1:Log into your Blogger account. Make sure you are on your Dashboard area. Under the Manage blogs, click on Layout.

Step 2:Pick out where you want to show off your recent comments, and click on the 'Add a Gadget'.

Step 3:Scroll down a little and choose the Feed option by clicking on the blue plus (+) sign.

Step 4:In the feed URL field, type in http://www.YOURBLOGURL.com/feeds/comments/full
Change the 'YOURBLOGURL' to your blog URL and hit continue.

Step 5:You can title it 'Recent Comments' or whatever you like, choose how many comments (1-5) and if you want to show dates and authors. Click Save when you are done.

Step 6:Save it and view your blog. You should see the latest comments now!

Saturday, January 30, 2010

Build Traffic From Add Social Bookmark Buton in Every Blogger Post

3 comments

The AddThis button is a very useful social bookmarking and sharing tool. With just a couple of mouse clicks, anyone can share a blog post or article via their social networking accounts, e-mail or blogs. Use it to increase traffic to your blog.

1. Open an AddThis account for free. Supply a username, password and e-mail address. Check on "E-mail me a weekly analytics report" if you so desire. Once you have registered, you can create an AddThis button.

2.Create an AddThis button. You can use the default code, but it's better to customize it to get the look you prefer. See the "Resouces" link at the bottom of this article for a link that lets you create your own button.

3. Go through the AddThis button wizard step-by-step. Specify Blogger as the medium you will be using it in. Next, choose the appearance you would like for your bookmarking and sharing button. Choose a familiar button that your readers will recognize. You can also select an RSS feed button besides to further increase traffic to your blog.

4. Preview your button. You will see the preview on the upper right side of the screen. Test it to see how it works. You will see links to all kinds of social bookmarking sites.

5. Get the code. Click on the gray button near the bottom of the screen.

6. Install to Blogger Sidebar. If you want to do this, you will be taken to the Blogger site so you can add an AddThis widget to your blog's sidebar.

7. Copy the code to your Blogger template. Right-click and select the AddThis code. Log in to your Blogger account. Go to Layout - Edit HTML. Search for "<div class='post-footer'>" or "<data:post.body/>" (without quotes) and insert the AddThis code after either line. You will now have an AddThis button in every blog post!

Friday, January 22, 2010

Latest Cool Animated Recent Post Widget With Thumbnail For Bloggers

31 comments
If you want to add animated recent post widget then you should add this widget in your blog sidebar.Just follow steps for "Cool Animated Recent Post Widget with Thumbnail".

1. Log in your blogger account

2.Go to Layout

3.Click on Sidebar Add a Gadget

4.Click on HTML/JavaScript

5.Now copy this code and paste in this page .


<script src="http://ajax.googleapis.com/ajax/libs/jquery/1.3.2/jquery.min.js" type="text/javascript"></script>
<style type="text/css" media="screen">
<!--
#spylist {
overflow:hidden;
margin-top:5px;
padding:0px 0px;
height:350px;
}
#spylist ul{
width:220px;
overflow:hidden;
list-style-type: none;
padding: 0px 0px;
margin:0px 0px;
}
#spylist li {
width:208px;
padding: 5px 5px;
margin:0px 0px 5px 0px;
list-style-type:none;
float:none;
height:70px;
overflow: hidden;
background:#fff url(http://dl.getdropbox.com/u/708209/scriptabufarhan/recentspy/post.jpg) repeat-x;
border:1px solid #ddd;
}

#spylist li a {
text-decoration:none;
color:#4B545B;
font-size:11px;
height:18px;
overflow:hidden;
margin:0px 0px;
padding:0px 0px 2px 0px;
}
#spylist li img {
float:left;
margin-right:5px;
background:#EFEFEF;
border:0;
}
.spydate{
overflow:hidden;
font-size:10px;
color:#0284C2;
padding:2px 0px;
margin:1px 0px 0px 0px;
height:15px;
font-family:Tahoma,Arial,verdana, sans-serif;
}

.spycomment{
overflow:hidden;
font-family:Tahoma,Arial,verdana, sans-serif;
font-size:10px;
color:#262B2F;
padding:0px 0px;
margin:0px 0px;
}

-->
</style>

<script language='JavaScript'>

imgr = new Array();

imgr[0] = "http://i43.tinypic.com/orpg0m.jpg";

imgr[1] = "http://i43.tinypic.com/orpg0m.jpg";

imgr[2] = "http://i43.tinypic.com/orpg0m.jpg";

imgr[3] = "http://i43.tinypic.com/orpg0m.jpg";

imgr[4] = "http://i43.tinypic.com/orpg0m.jpg";
showRandomImg = true;

boxwidth = 255;

cellspacing = 6;

borderColor = "#232c35";

bgTD = "#000000";

thumbwidth = 70;

thumbheight = 70;

fntsize = 12;

acolor = "#666";

aBold = true;

icon = " ";

text = "comments";

showPostDate = true;

summaryPost = 40;

summaryFontsize = 10;

summaryColor = "#666";

icon2 = " ";

numposts = 10;

home_page = "http://www.latestbloggertricks.com/";

limitspy=4
intervalspy=4000

</script>

<div id="spylist">
<script src='http://dl.getdropbox.com/u/708209/scriptabufarhan/recentspy/recentpostthumbspy-min.js' type='text/javascript'></script>
</div>


6.Replace "www.latestbloggertricks.com" in your blog name.

7. Click on Save and that's it.

Tuesday, January 19, 2010

Show Related Post Under Each Post and Increase Pageviews

0 comments

LinkWithin is a blog widget that appears under each post, linking to related post your blog archive.This Gadgets index all stories from your blog archive, not just recent stories, making them accessible to new or casual readers of your blog who would not otherwise encounter them.Increase Pageviews, Keep Readers Engaged,The widget links to stories that are relevant and interesting to readers of a particular post, keeping them engaged with your blog, and increasing your traffic.
The widget is free and ad-free. It takes a minute to get the widget up and running on your blog, no signup required!

Get this Widgets

Monday, January 18, 2010

4 Places to Put Widgets on Blogger Free

0 comments
Although Blogger is one of the most widespread platforms for blogging, we are all aware that the limitation is in regards to widgets. Though Blogger in draft always allow a few more options than the normal Blogger, the service still has shortcomings in this regard. Well, they've added Google Gadgets to the possibilities of widgets but ...

However, if we're in need of a widget that we offer a special function not found in Blogger, we rely on third parties. Using any of the services that we will see below, you may find what you need:

Widgetbox: Perhaps one of the most popular services. It has a wide variety of widgets classified by tags and has an internal search. No registration is required, although it is free. Without doubt, the first place to look.

SpringWidgets: Offering more than 40,000 widgets listed by categories and tags, plus search engine available. Does not need to register.

yourminis: It has fewer widgets available prior service, but is fast and fluid. It is not classified either by categories or by tags, but has an internal search.

Widgiland: Widgets of all colors and platforms, whether a social network, your desktop, iPhone, Andriod ... and blogs, of course. Although this last point, the number of widgets is quite short relative to the first two. No registration is required.

Friday, January 15, 2010

Attention to your Visitor from Twitter Buttons for Bloggers

1 comments
A great way to draw more attention to your Twitter feed and to get more people following your Twitter is by posting a “Follow Me On Twitter” button right by the feed. I took the time to make up some free graphics for anyone that would like to use them. I supplied every version with a GIF with transparent background and a PNG with white background.
You can download the graphics by right clicking the image and downloading the link. Just place the image on your site and link to your Twitter profile.

Animated Twitter Button GIF with white background:
animated twitter button

Animated Twitter Button GIF with transparent background:
animated twitter button

Animated Twitter Button GIF with white background:
animated twitter button

Animated Twitter Button GIF with transparent background:
animated twitter button

Animated Twitter Button GIF with white background:
animated twitter button

Animated Twitter Button GIF with transparent background:
animated twitter button


PNG with white background:
TWITTER BUTTONS
GIF with transparent background:
TWITTER BUTTONS

PNG with white background:
TWITTER BUTTONS
GIF with transparent background:
TWITTER BUTTONS

PNG with white background:
TWITTER BUTTONS
GIF with transparent background:
TWITTER BUTTONS

PNG with white background:
TWITTER BUTTONS
GIF with transparent background:
TWITTER BUTTONS

PNG with white background:
TWITTER BUTTONS
GIF with transparent background:
TWITTER BUTTONS

PNG with white background:
TWITTER BUTTONS
GIF with transparent background:
TWITTER BUTTONS

PNG with white background:
TWITTER BUTTONS
GIF with transparent background:
TWITTER BUTTONS

PNG with white background:
TWITTER BUTTONS
GIF with transparent background:
TWITTER BUTTONS

PNG with white background:
TWITTER BUTTONS
GIF with transparent background:
TWITTER BUTTONS

PNG with white background:
TWITTER BUTTONS
GIF with transparent background:
TWITTER BUTTONS

PNG with white background:
TWITTER BUTTONS
GIF with transparent background:
TWITTER BUTTONS

PNG with white background:
TWITTER BUTTONS
GIF with transparent background:
TWITTER BUTTONS

PNG with white background:
TWITTER BUTTONS
GIF with transparent background:
TWITTER BUTTONS

PNG with white background:
TWITTER BUTTONS
GIF with transparent background:
TWITTER BUTTONS

PNG with white background:
TWITTER BUTTONS
GIF with transparent background:
TWITTER BUTTONS

PNG with white background:
TWITTER BUTTONS
GIF with transparent background:
TWITTER BUTTONS

PNG with white background:
TWITTER BUTTONS
GIF with transparent background:
TWITTER BUTTONS

PNG with white background:

TWITTER BUTTONS
GIF with transparent background:
TWITTER BUTTONS

PNG with white background:

TWITTER BUTTONS
GIF with transparent background:
TWITTER BUTTONS

PNG with white background:
TWITTER BUTTONS
GIF with transparent background:
TWITTER BUTTONS
PNG with white background:
TWITTER BUTTONS
GIF with transparent background:
TWITTER BUTTONS
PNG with white background:
TWITTER BUTTONS
GIF with transparent background:
TWITTER BUTTONS
PNG with white background:
TWITTER BUTTONS
GIF with transparent background:
TWITTER BUTTONS
PNG with white background:
TWITTER BUTTONS
GIF with transparent background:
TWITTER BUTTONS
PNG with white background:
TWITTER BUTTONS
GIF with transparent background:
TWITTER BUTTONS
PNG with white background:
TWITTER BUTTONS
GIF with transparent background:
TWITTER BUTTONS

Horizontal buttons:

PNG with white background:
TWITTER BUTTONS
GIF with transparent background:
TWITTER BUTTONS


Latest Blogger Tricks,Tips,Tutorial,Template,Widgets